How to Install a 24V to 12V DC-DC Converter
In modern electrical systems, many devices require specific voltage levels to operate properly. When using a 24V battery or power source, it is often necessary to convert that voltage to 12V for use in certain devices. Whether you are dealing with an automotive electrical system, a solar installation, or industrial machinery, using a DC-DC converter can ensure that your equipment runs smoothly and efficiently.
But simply purchasing a 24V to 12V DC-DC converter is not enough. To get the most out of your power system, the installation process is crucial. In this article, we will walk you through how to properly install and configure a 24V to 12V converter to ensure a worry-free experience and optimal performance.Why Use a DC-DC Converter?
In everyday life, common devices like 12V lights, battery-powered electronics, and small appliances often require a different voltage from the one available. A DC-DC converter is the perfect solution for efficiently converting 24V DC power to the 12V output needed for your devices.
The key advantage of using a DC-DC converter is its efficiency. Unlike linear regulators, which dissipate energy in the form of heat, DC-DC converters can achieve over 90% efficiency, ensuring that very little power is lost during the conversion process. This makes them an ideal choice for a wide range of applications such as in vehicles, solar power systems, drones, and other electronics.
Applications of DC-DC Converters:
- Automotive: Powering 12V systems from a 24V vehicle battery.
- Renewable Energy: Converting 24V DC from solar panels to 12V for household use.
- Industrial Equipment: Ensuring proper voltage for different equipment requiring 12V.
- Consumer Electronics: Safe operation of devices designed to run on 12V DC.
How to Choose the Right 24V to 12V Converter?
Before installing, it’s essential to choose the right converter for your application. The market is flooded with various DC-DC converters, so selecting the correct one is vital to ensure proper function and efficiency.
- Understand the Current Requirements
The first step in choosing the right converter is to determine the current demand of your 12V devices. For example, if your 12V system requires 10A, you need a converter that can handle at least 12A. This ensures that the converter can operate safely under full load without overheating or failing.
- Check the Input and Output Voltage Range
Make sure the converter supports a 24V input and can output a stable 12V. Many high-quality converters come with a broader input voltage range than the nominal rating, which allows them to handle voltage fluctuations better.
- Look for Protection Features
Many modern DC-DC converters come with built-in protections, such as over-voltage protection, over-current protection, and short-circuit protection. These features help safeguard your equipment, ensuring that the converter automatically shuts down in case of a fault.
How to Install a 24V to 12V DC-DC Converter
Step 1: Preparation
Before you begin, make sure you have all the necessary tools and materials on hand. Here’s a list of the basics you’ll need:
- 24V to 12V DC-DC Converter (choose one based on your current needs)
- Wire stripper
- Multimeter
- Soldering tools (optional)
- Heat shrink tubing or electrical tape
- Mounting brackets or adhesive pads
- Fuse for protection
Step 2: Understand the Wiring Diagram
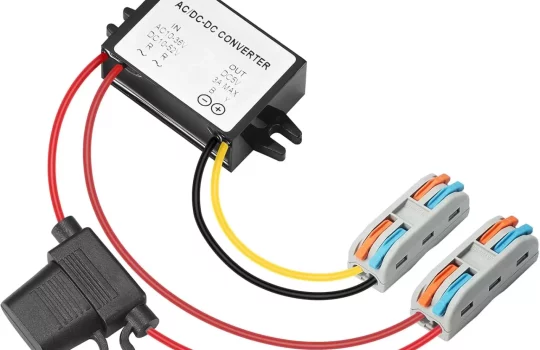
Most DC-DC converters come with four primary connection terminals:
- VIN+: Connects to the positive terminal of the 24V power source
- VIN-: Connects to the negative terminal of the 24V power source
- VOUT+: The 12V output positive terminal
- VOUT-: The 12V output negative terminal
Always refer to the user manual for the specific wiring instructions for your converter.
Step 3: Wire and Connect the Converter
- Disconnect Power: Before connecting anything, make sure the 24V power source is turned off to avoid electric shock or damage to components.
- Prepare the Wires: Choose wires according to the current draw—use 16 AWG for loads under 5A or 12-14 AWG for higher currents (above 10A).
- Strip the Wire Ends: Strip about 5-10mm of insulation from both ends of the wires that will connect to the converter.
Step 4: Connect the Converter
- Connect the Input Terminals:
- Attach the VIN+ wire to the positive terminal of the 24V power source.
- Attach the VIN- wire to the negative terminal of the 24V power source.
- Connect the Output Terminals:
- Connect the VOUT+ wire to the positive terminal of the 12V device.
- Connect the VOUT- wire to the negative terminal of the 12V device.
- Secure Connections: Ensure all connections are secure and that there’s no loose wiring. Use heat shrink tubing or electrical tape to insulate the exposed wires.
Step 5: Test and Verify the Installation
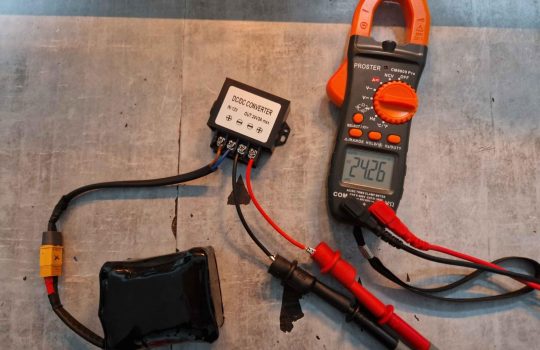
- Check the Wiring: Use a multimeter to verify that all connections are correctly made, and there are no shorts.
- Power On: Turn on the 24V power supply and check the output voltage at the VOUT+ terminal to ensure it’s around 12V. If the output is unstable or lower than expected, check the input voltage and connections.
- Load Test: Connect the 12V device to the output and ensure it operates correctly. The converter should maintain a steady output under load.
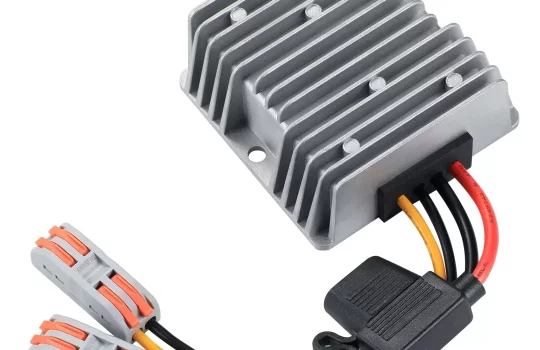
Step 6: Install Protection Devices
To protect your devices from surges or overloads, it’s advisable to install a fuse at both the input and output terminals. The fuse will automatically disconnect the power in case of overcurrent, preventing damage to the converter or your devices.
Common Problems and Troubleshooting
- No Output Voltage
Possible Cause: Incorrect wiring or unstable input voltage.
Solution: Double-check the wiring, ensuring the input and output connections are correct. Use a multimeter to verify the input voltage at VIN+.
- Unstable Output Voltage
Possible Cause: Overloaded converter or faulty converter.
Solution: Reduce the load on the converter and test the output voltage again. If it’s still unstable, consider replacing the converter or choosing a higher-capacity one.
- Overheating Converter
Possible Cause: Excessive load or poor ventilation.
Solution: Ensure that the converter is in a well-ventilated area. If necessary, add a heatsink or switch to a higher-rated converter.
Installing a 24V to 12V DC-DC converter is a straightforward process, but to get the best performance, you need to carefully follow the steps and understand the underlying principles of voltage conversion. By following this guide, you’ll not only successfully install the converter but also gain a deeper understanding of how it works and how to maintain it.
Remember, choosing the right converter, making correct connections, and properly testing your setup are the key factors that will ensure a stable and efficient power supply for your 12V devices.